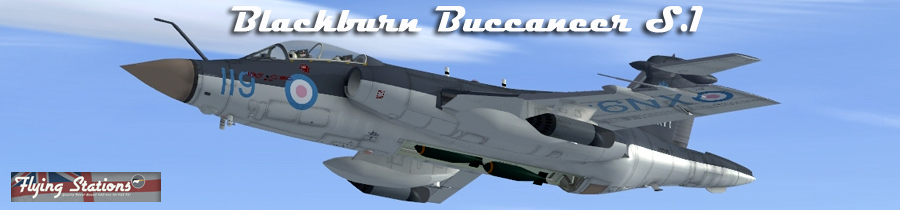
Background
The Blackburn Buccaneer was one of Britain’s finest small jet
bombers post war. It was eventually used by both the Royal Navy
and the Royal Air Force (as the S.2B), but the RAF’s use of the
aircraft stirred up an outrage. But more on that later.
The Naval Air Specification NA.39 of July 1953 (later M.148T)
called for a long range, carrier borne and nuclear capable
aircraft. Amongst others, Blackburn responded with their B.103.
It had blown controls (tested on Meteors), an area-ruled wing
and a rotating bomb bay, dispensing with bomb bay turbulence.
Another distinctive feature much appreciated by crew was the
miniature detonating cord canopy, which blew the canopy to
pieces just prior to ejection.
The first prototype (out of 20 pre-production aircraft) flew on
the 30th April 1958 and performed at the Farnborough Air Show
that year. The 20 aircraft performed various aerodynamic and
avionic trials, building up to the production S.1 aircraft.
Unfortunately, during the testing, three aircraft were lost.
Number 5 was destroyed first, having stalled at 10,000ft and not
recovered. The 1st prototype was destroyed when the pilot sensed
that the aircraft was rolling with no input. The cause was that
the ADI failed in cloud. Finally, aircraft 12A (aka 13) crashed
on carrier trials. Only the crew of the 1st prototype survived.
The Buccaneer S.1 (named in August 1960) was nearly sold to the
Marineflieger (German Navy), but they chose the F-104
Starfighter instead. The Navy formed 700Z Sqn to ease the
aircraft into service. Once done, HMS Eagle embarked on a short
cruise.
In service, the aircraft was shown to be underpowered. The Gyron
Junior engines only produced 7,100lbs each and it was shown in
hot conditions the aircraft couldn’t take off with a full load,
so was re-fuelled en-route by Scimitars.
This main problem was resolved in the S.2, which was first flown
in May 1963. It was a bigger aircraft powered by more powerful
Rolls Royce Spey engines. This version scored the only export
order of the Buccaneer’s life – 16 examples were purchased for
South Africa.
 Buccaneer S2’s XX894 and XX889 at Bruntingthorpe, UK |
The S.2 version was also acquired by the Royal Air Force, after the cancellation of the BAC TSR-2 in 1965. The RAF was initially reluctant to have the Buccaneer, but once in service, it soon proved to be an excellent aircraft. It starred in the ‘Red Flag’ exercises in the Nevada desert. (Red Flag is a ‘war game’ in the US where the defenses are tested and pilots given combat training etc.)
Unfortunately, it was at Red Flag that a Buccaneer crashed due to serious fatigue cracking in a spar. All RAF examples (except maritime squadrons 12 and 216) were grounded until a fix could be found. New spar rings were fitted gradually and the fleet re-entered service.
 Buccaneer S2 XW554 at Bruntingthorpe, UK |
The Buccaneer’s finest hour was in the Gulf. Under Operation “DESERT STORM”, Buccaneer’s carried laser designators for laser guided bombs, also carried by the replacement for the Buccaneer – the Panavia Tornado GR.1. It also dropped its own weapons, not losing a single Tornado or “Bucc”, and with most bombs hitting the target.
 Buccaneer S.2 XW863 at Weston, Ireland |
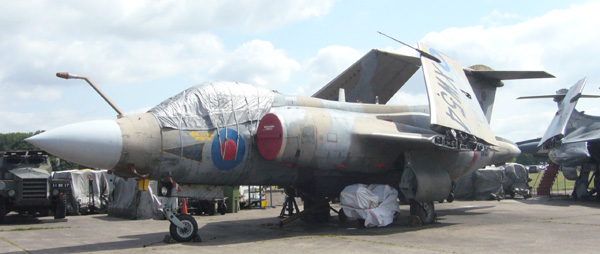
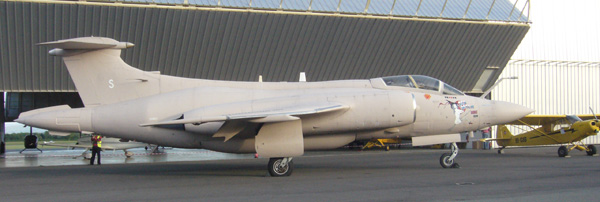
The end was nigh, and after the war, most Buccaneers were withdrawn and scrapped. The SAAF withdrew their examples on 30 June 1991, with the final three British examples withdrawn in October 1994. A total of 51 examples from cockpits to full aircraft survive around the world.
Although no longer flying (since Thunder City closed down in South Africa), a few Buccaneers can still taxi. The majority of these are at Bruntingthrope in the UK, where they operate alongside other classic British jets.
For more information of the Buccaneer, visit http://www.thunder-and-lightnings.co.uk/buccaneer/index.php
Downloading and Installing
I received the review copy by download. It’s a 62.8mb download, and it is easy to install. One thing that would be useful is for the manual to open up at the end of the installation, because there is an awful lot of extra bits and pieces that are needed to operate the Buccaneer properly.
What you get
Backburn Buccaneer S1 - 736 NAS All over Sea Grey
800 NAS Sea Grey over Anti-Flash White (HMS Eagle)
801 NAS Sea Grey over Anti-Flash White (HMS Victorious)
809 NAS All over Anti-Flash White
You also get a 33 page manual, describing various aspects of the Buccaneer’s operation and a brief history. It also includes a note about a possible future expansion pack for the Buccaneer S2
Visual of what you get:
 |
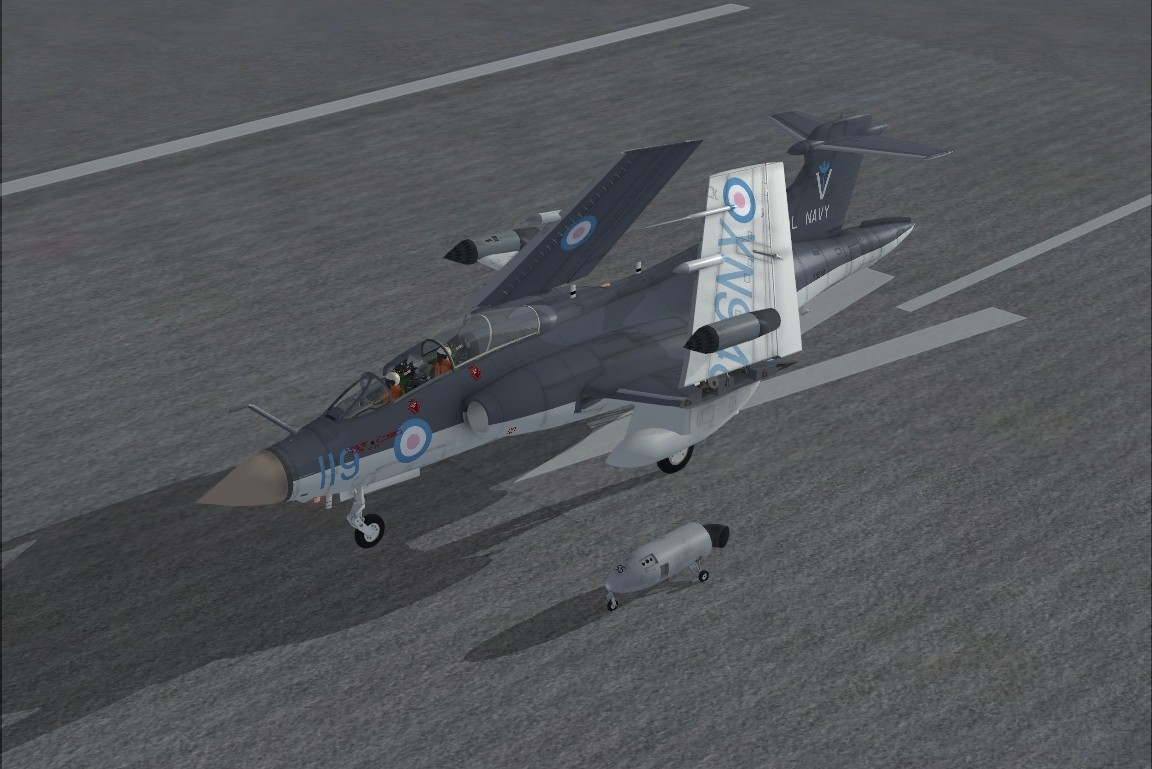
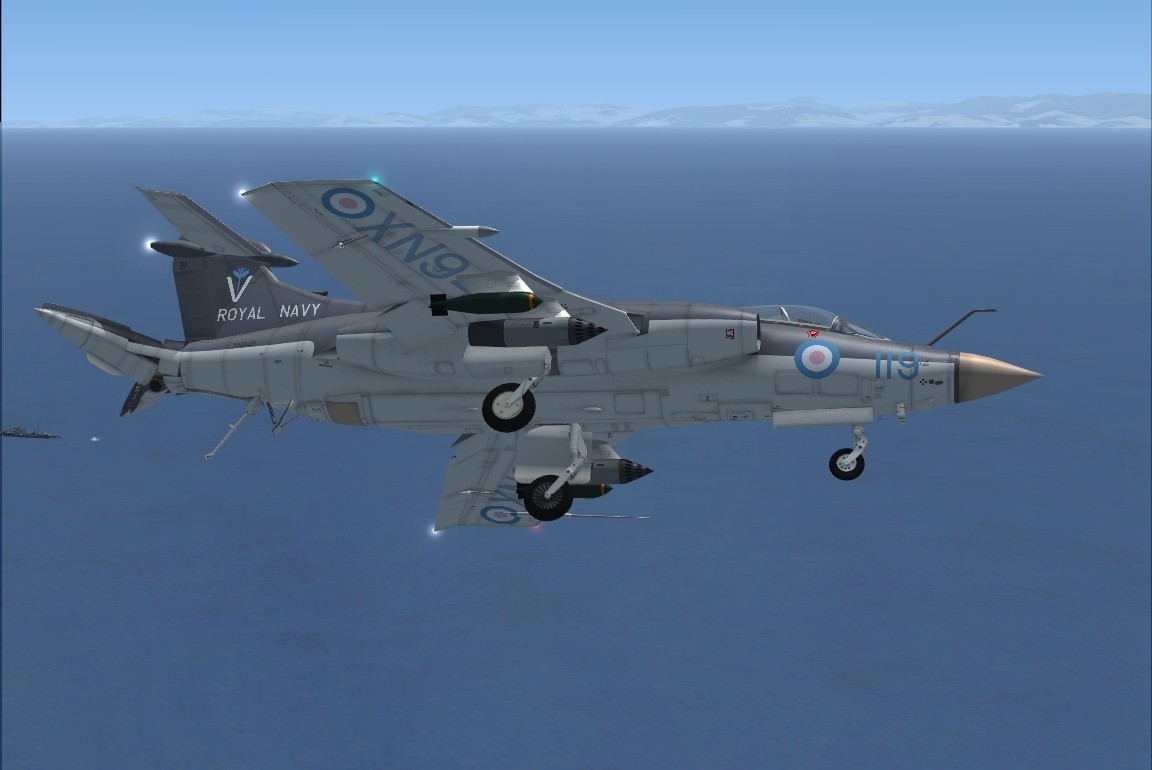
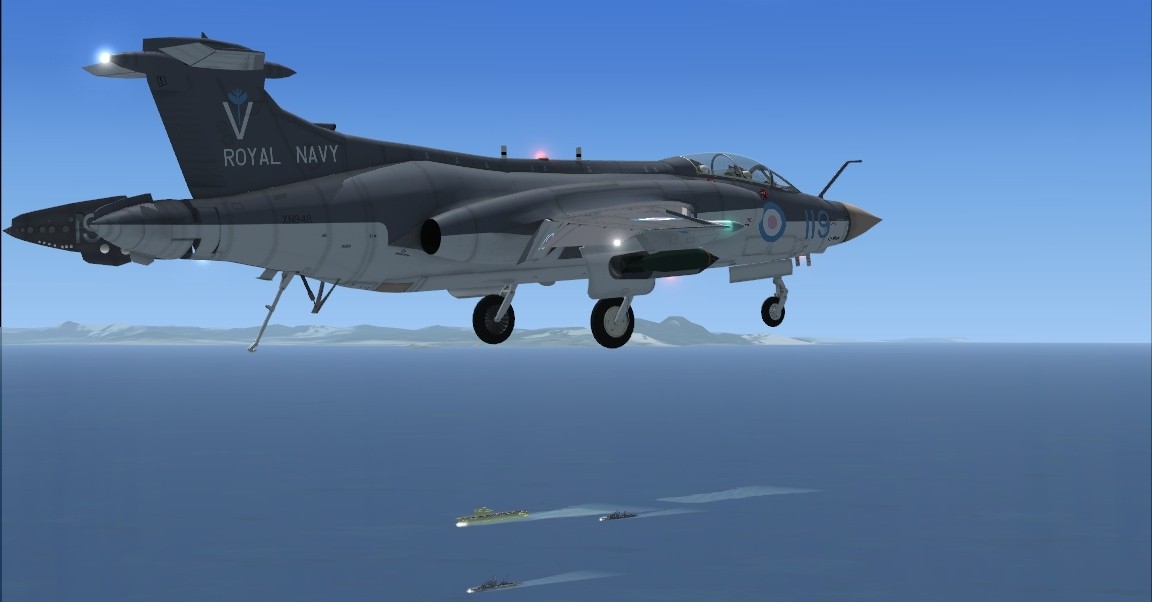
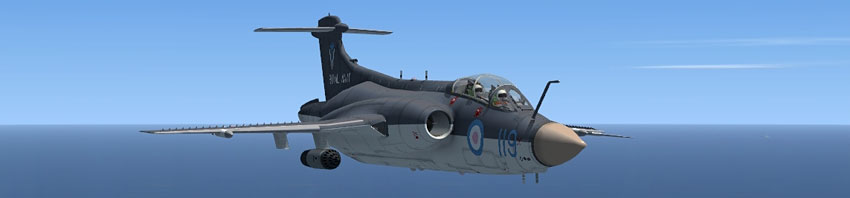
Exterior
Well, where to start! The team at Flying Stations have done a good job in capturing the look of the Buccaneer. Comparing it to photographs, the overall dimensions are good, along with the overall ‘look’. A very nice feature I think is the toggling IFR (In Flight Refuelling) probe, allowing you to span the years of the S.1.
 |
 |
The most interesting animation is of the air-brake. As this is required to slow the aircraft and keep the aircraft in the constant rate of descent for a carrier landing, a handy little pop up gauge is provided to control the air-brake in this important stage. The actuators are modelled as well, pushing or pulling the air-brake in.
The radome is accurately coloured – the cream is spot-on and the rest of the colours seem accurate judging by photographs. The bombs have an accurate ‘yellow nose’, denoting the fact that they are live weapons and the bomb bay rotates nice and smoothly.
Another feature is the load-out and flight manual pop-ups, that dynamically shows your loads, weights and the correct check-lists
 |
 |
All the usual animations are there, including canopy opening and a ground air starter. This connects to the aircraft when the engines are off and disconnects and moves away when you switch to internal DC power.
Little animations really bring the aircraft to life. When you fold the wings, the little covers where the mechanics are fold up and allow the wings to fold. After loading the aircraft heavily, the aircraft visibly sinks on the undercarriage with the extra weight.
 |
|
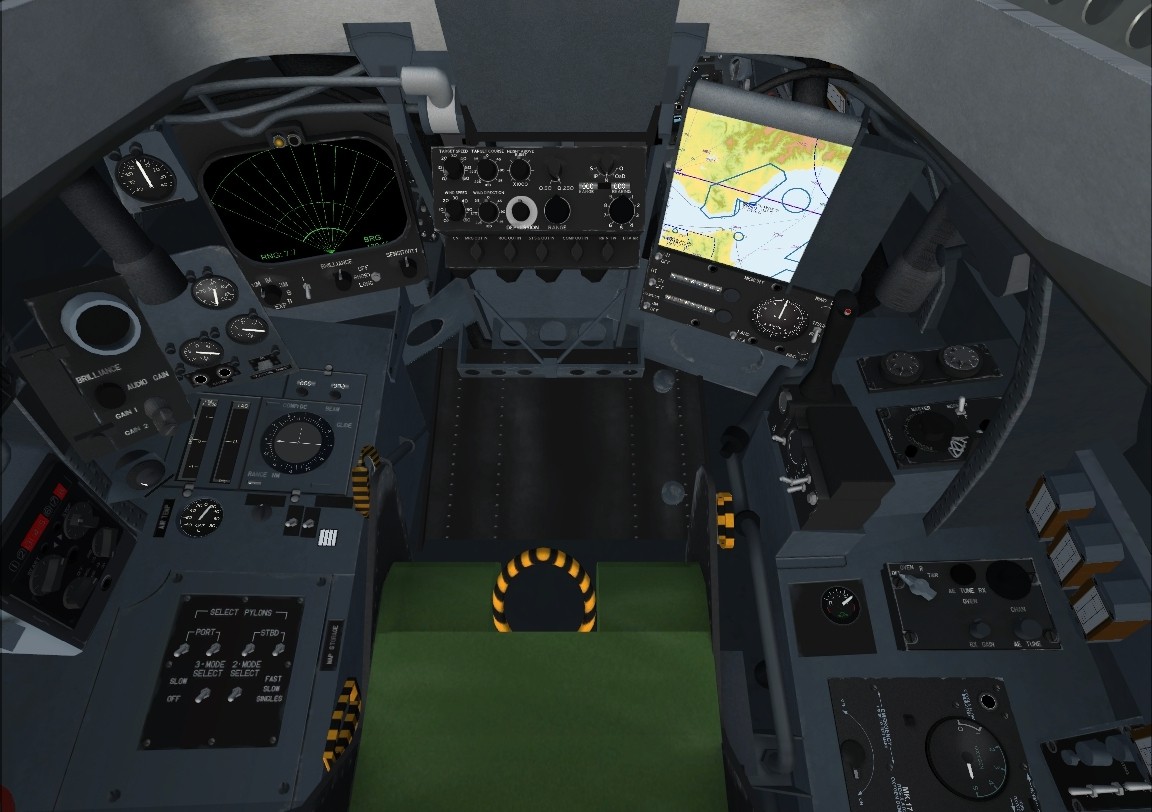
Interior
There are two cockpits included:
Front Cockpit
This is where you’ll spend most of your time. The cockpit is generally in the traditional bluey kind of colour, and helps set the scene. The cockpit layout is not conventional. Underneath the folding Pilot’s Attack Sight (PAS), you have the speed tape gauge. To the left you have the radar altimeter, blow gauges and the deck landing aids (speed and angle). To the right is the G-meter.
Below the speed tape is the main Artificial Horizon, with the heading indicator to the right. To the left are the altimeter and vertical speed indicator. All are accurate to the eye and operate well in their respective roles.
To the right of the windscreen are three lights. These tell you if you are high, low or ‘bang on’ in relation to the radar altitude that you have set.
The most annoying thing about the front cockpit is that of default views. It would be incredibly helpful to have a view showing the fuel cocks and starter switches. The fuel cocks are to the far left of the pilot, right next to the seat edge. The starter switches are behind these, and require you to move the viewpoint to this position.
To the right of the pilot are a number of switches, the autopilot and the most important gauge – the fuel loads. It shows the loads in an upright format. If you see some levels between the two main sets, don’t be worried – this is the overload tanks. They will automatically dump the fuel into the main tanks.
|

|
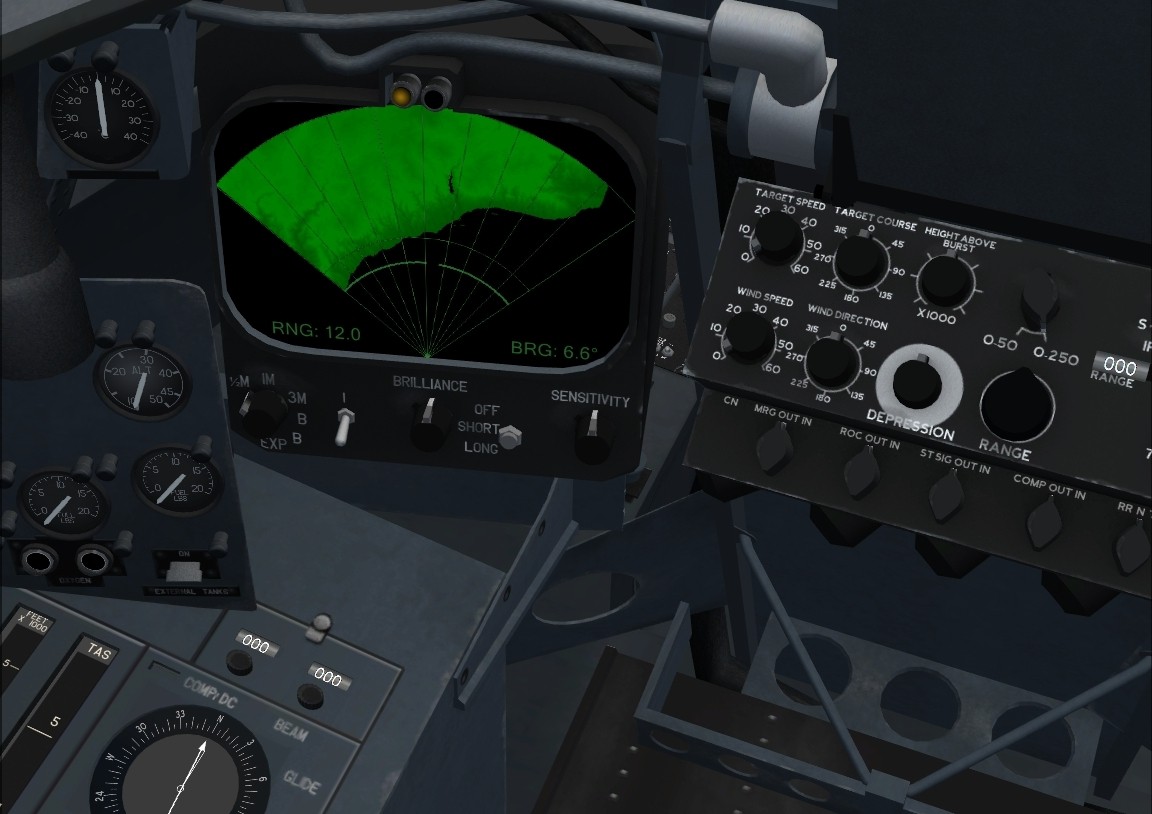
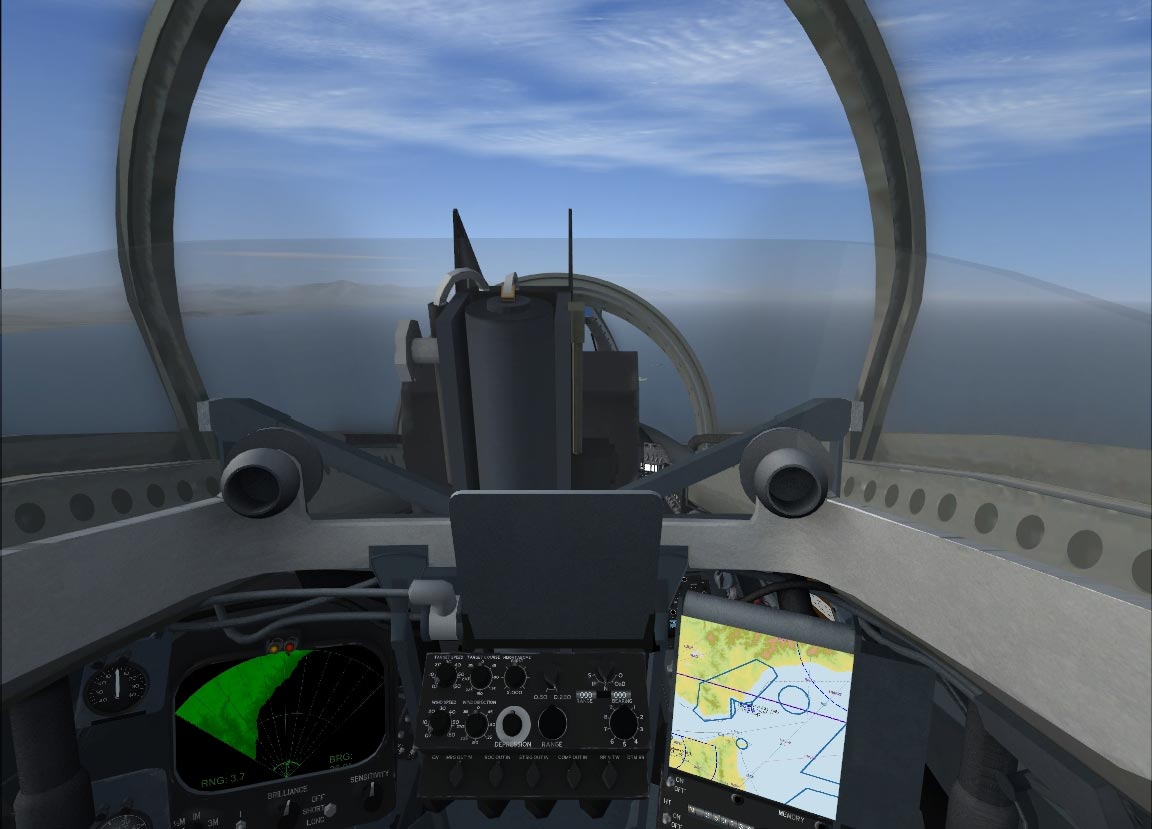
Rear Cockpit
This is the simpler of the two in terms of design. The cockpit is dominated by the two ‘radar’ screens – the one on the left is your target radar, whilst to the right is the moving map display. This acts as your GPS and shows you the same information as the default GPS, but with the addition of co-ordinates.
Directly in front of you are the range and offset buttons. These allow you to create an offset from a known position, i.e. to bomb a runway where the image is not good.
|
|
It takes a bit of practice with the radar set to get a good lock and an offset. A switch is provided under the moving map display so that only targets on water or land can be locked on.
Apart from these important things, the rest of the detail is good, although a lot of switches are non-functioning.
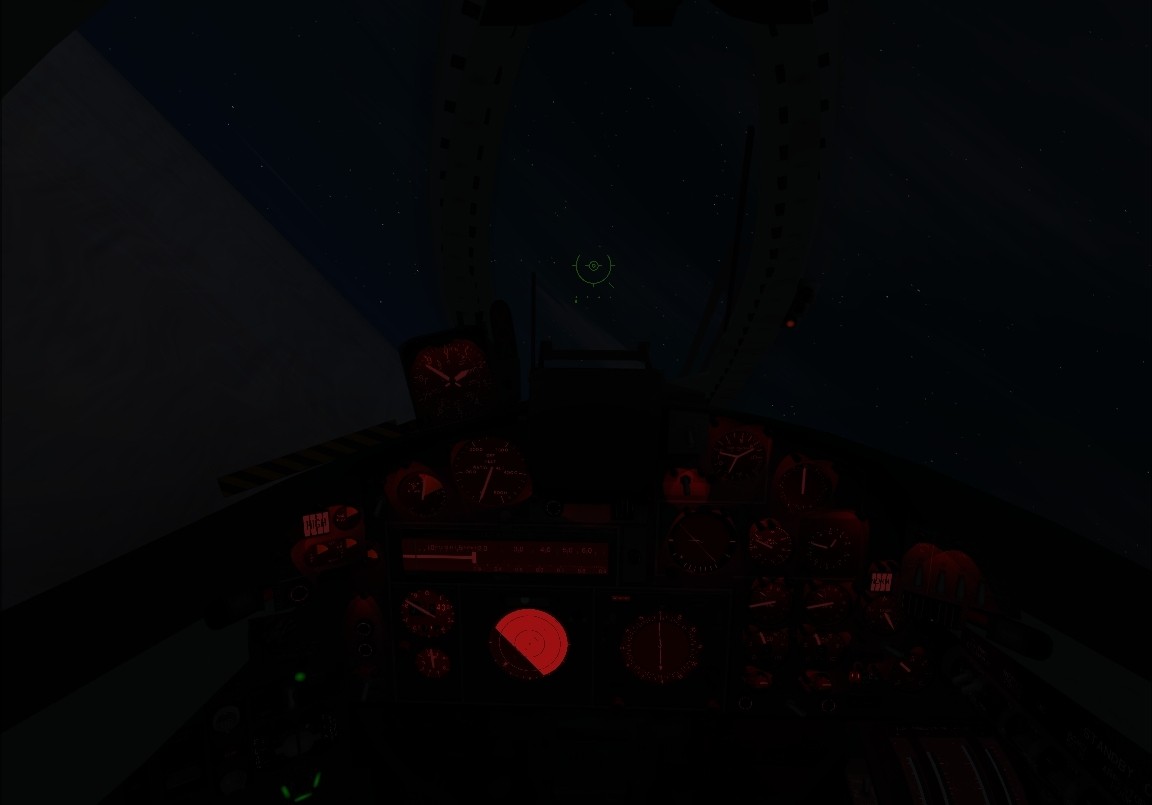
Night Lighting
The night lighting is excellent. It feels right with the red glow behind the main instruments. Some of the switches are hard to find and click at night (on the side walls, for example). In the rear cockpit, the overall feel is of darkness (required to get good radar pictures).
Weapons Systems
I’ve added this section in to describe the rather complicated (for the first few times) weapons system, namely the Over the Shoulder (OTS) attack. It requires the use of both the front and rear cockpits, and can be quite a handful.
Firstly, you need the start up the radar system in the observer’s cockpit. The radar requires the DC electrical systems to be on. There are two switches – they are both near the little joystick. Flick the switches and above the screen, a yellow light should come on. Now you need to lock on to a ‘target’. Right click for land, left click for sea. A lock is a red light to the right of the power light.
Back to the front cockpit, and to your left is the armament rotary switch. You can select either bombs, rockets, normal bomb OTS, ‘Red Beard’ OTS, normal dive, ‘RB’ dive or none (safe). This is just in front of the jettison knob. For this run, we’ll select ‘TMB OTS’, i.e. a Red Beard nuclear bomb attack thrown over the shoulder of the aircraft. Flip up the PAS and you should see what’s happening.
 |
 |
After that, it’s just a question of following the PAS. To start off the OTS attack, you need to press the trigger to accept the attack. Then, following the PAS guides, at 120 degrees the bomb will release.
The other weapons are much easier. The dive attack is a simple dive, again following the PAS. The conventional bomb and rocket attack are done by arming the weapons needed, then pulling the trigger.
Sounds
Generally, the sounds are brilliant. The sound of the engines winding up from cold is excellent. At full power, they roar realistically. On shut-down, the aircraft engines wind down really well, when compared to the real life examples. The weapons do make their own sounds, with the rockets especially pleasing.
Interior sounds are interesting. You get a sort of electrical sound overall, with little engine sounds. People have reported this to Flying Stations, and the explanation is that crew members would have a ‘bone dome’ helmet on, covering all the engine sounds and the electrical sounds are the helmet. The warning alarms are impossible to ignore, luckily.
Flight Dynamics
The flight dynamics are good. The Buccaneer S.1 was known to be underpowered and in my experience of the aircraft, that shows through. The difference at low speed between blow on and blow off is noticeable, allowing you to do more with the aircraft.
The aircraft accelerates slowly and has trouble slowing down without the use of the airbrake. Again, this feels accurate and conforms to the flight reports that I’ve found. One interesting thing about it is that when you fire off the catapult on a carrier, it needs to be moving or have a 20kt wind, or you won’t get airborne.
At higher speeds, the aircraft is stable and very responsive. Trim is needed when you’re flying at 500kts at 250ft radar altitude.
Flight
Start up is an interesting affair. The basic start is easily done, but the position of the switches is awkward. The fuel cocks and the starter switches are to the side of the pilot’s seat, and you move to switch them. Apart from that, it’s easy enough – the DC generator switches are used once the engines are running and stable.
With the available power, taxiing takes a large amount of power to get moving. I would advise starting the radar set up during the taxi, so that once airborne you can use it. Steering is done via the nose gear and the differential brakes on the main landing gear. If the wings are still folded, it might be a good idea to spread them.
It takes a bit of time to get the aircraft off the ground, and blow air does help in this respect. Flaps are down, and with that brake on, power up. I generally held the aircraft on brakes before releasing and flying. You can specify the aircraft to automatically raise the landing gear – this is generally used for carrier take-offs.
With blow on, the low speed handling is good. With it off, I found that at low speed, handling wasn’t as good. At high speeds, the aircraft is responsive to inputs. The speed brake has a dramatic effect on the speed – it washes off rapidly, but is controllable by the handy pop up gauge.
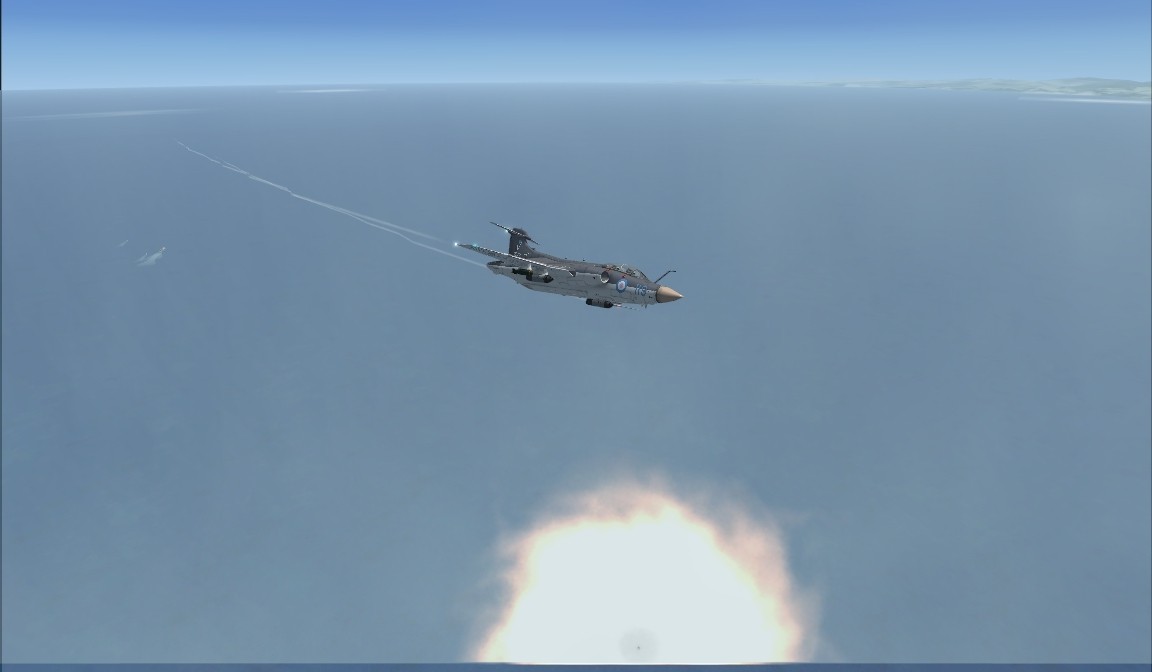
For the OTS attack, I’ve used the TMB bomb, nicknamed ‘A bucket of sunshine’, since it is a nuclear weapon. Designed for the Canberra bomber, it is in fact the ‘Red Beard’ weapon. To launch, radar lock needs to be acquired. I decided to use the carrier as the target.
Once locked on and weapon selected, the PAS will show the target in a small circle. Aim for that initially. The mark above the circle is the ‘Weapon Ready’ symbol. You will need to accept the attack by pressing the trigger, making another mark appear below the circle.
The big circle surrounding the target (hopefully!) is the distance to run. The circle will start decreasing at about 12nm to run. A little mark near the edge is your pull up point, where the computer has calculated the bomb will need to be released. At that point, just follow the target circle and it will release the weapon after around 120 degrees. After that, run away from the blast!
|

|
The effect of the bomb releasing is noticeable, as quite a weight has been released from the aircraft centreline. That pales in comparison with the actual effect of the bomb exploding. The flash and subsequent clouds of smoke are impressive. Plus, if you miss, it doesn’t really matter!
Once the clouds of smoke have dissipated, it’s time to land on the carrier. It is a good idea to follow the guide in the manual, so to land properly. It is great to know that the developer has thought about that. The air-brake progressively opens out and the gear and flaps come down as expected, with the effect of the trim going down. I guided myself in with the TACAN (radio) and a radar lock, just to be safe!
It takes a bit of practice to perfect a carrier landing. Even more so with the ‘Wire Caught’ gauge. It tells you the wire you caught with the hook, your speed and the rate of descent. I was shocked at how hard I landed sometimes!
Once on the deck, I decided to fold the wings and park next to a couple of Buccaneers. This is part of the Flying Stations ‘Ark Royal’ package, and is used in all the carrier shots in this review.
To launch the Buccaneer, the carrier needs to be moving. To do this, I would recommend AI Carriers as an easy way to get the carrier moving. Failure to launch off a carrier whilst moving will result in you getting rather wet!
The Buccaneer is a pleasure to handle during taxing. Once you are at the catapult, use the take-off arming and prepare to be pushed upwards. This is not an aircraft problem – the Buccaneer used a system of girdle and tie-downs to get the correct amount of angle for a successful launch.

|

|
Launching is easy and over in seconds. For this, I used the automatic landing gear button – this raises the gear as soon as there is no pressure on the undercarriage. It works well, after lifting the cover, and confirming the red light below has lit.
Flaps up and we’re accelerating away. Make sure that after reaching around 200-250kts, switch off blow air. All it’s doing after that is taking power from the engines and making it too responsive.
You can drop a bomb it in three ways – drop it and hope for the best, get a radar lock, get a radar lock and do an offset, or do an OTS attack. For this, I decided for a simple ‘drop and hope’ technique. Once armed, it’s a case of pulling the trigger and watching the bomb drop away. Rockets are the same, except there isn't an OTS attack.
Landing on land is the same as on a carrier, except that you don’t lower the hook. It is a stable aircraft in the approach and lands quite nicely after a few hours of practice.
Again, taxiing back is easy, and the brakes help in the steering. When shutting down, the warning horns will blare, but in a minute I switched off the battery, as it was my last flight of the day.
System Specs Required
• Internet connection (for download only)
• Microsoft Flight Simulator X Acceleration)
• 2.0 GHz or any Dual Core processor
• 2.0 GB of RAM
• 150 MB hard drive space
• 512 MB video card
Frames Rates
• On the ground (ORBX freeware Cunderdin) – VC - 20fps
• Outside - 17fps
• On the carrier (AI Carriers) - VC - 15fps
• Outside – 16-18fps
• In Flight at 10000ft - VC 15-25fps
• Outside 15-20 fps
Note on Frame rates – Whilst 10-20fps may sound slow, and it is, but the default Cessna 172 barely tops 20fps outside, and about 20-30fps in the VC. This is because my system isn’t great for FSX.
Total flight time – 15.0 hours with 20+ carrier landings.
Pluses
• Good looks
• Interesting to operate with the radar
• Weapons system modelled
Cons
• Documentation on the weapons system could be better
•The use of the ground starter at sea
 |
Kieran Marshall![]()
Verdict
![]()
• External Model:
• Internal Model:
• Sounds:
• Flight Characteristics:
• Flight Dynamics:
• Documentation:
• Value for Money:
9.5/10
9.0/10
8.5/10
9.0/10
9.0/10
9.0/10
9.5/10
Final Mutley's Hangar Score 9/10
Once again Flying Stations have excelled themselves. There
are lots of little features that don’t need to be there, but
are there for realism. The working TACAN is an excellent
addition. In the radar displays, although it doesn’t take 5
minutes to warm up, the system still models the effect of
the warming up without radiating the people working around.
The bombs and rockets are an interesting, yet highly fun,
addition. Used in co-operation with the radar equipment, it
is rewarding when you do drop that first OTS bomb.
![]()
Review machine Spec:
Intel Core2 6400 @2.13GHz | 2GB RAM |ATI Radeon X1300 |Windows
XP